In the dynamic world of WordPress website management, efficient support and debugging are paramount. Occasionally, you might find yourself in a situation where you need to grant temporary administrative access to our support team or a developer without compromising your site’s security. In this step-by-step guide, we will explore two methods to achieve this: manually creating a temporary admin user within the WordPress dashboard and utilizing a plugin for added simplicity.
Whether you prefer the traditional approach or seek a more streamlined solution, we’ve got you covered. Read on to discover how to create a temporary admin user, test their access, and, importantly, remove their privileges once the task is complete.
Manually creating a temporary WordPress User
- Log in to Your WordPress Dashboard
-> Initiate the process by logging into your WordPress admin dashboard using your existing administrator credentials. - Navigate to Users
-> Locate the “Users” option on the left-hand side menu and click on it to access the Users page.
- Add New User Manually
-> Click “Add New” on the Users page to create a new user.
-> Complete the required user details, such as username and email.
-> Assign the user role as “Administrator.”
-> Generate a strong password or set one manually.
-> Optionally, send the new user a notification.
-> Click “Add New User.”
Test the New User: Log out of your current admin account and log in with the credentials of the newly created temporary admin user to ensure that it works as expected. - Remove the Temporary Admin User (After Use)
After our support team finishes debugging or providing support, you can go ahead and remove the temporary admin user. To do this:
-> Go back to the Users page in the WordPress dashboard.
-> Locate the temporary admin user in the list.
-> Click on the user to edit their details or hover over it to see the option to “Delete”.
-> Scroll down to the bottom and click the “Delete” button.
Using the “Temporary Login Without Password” Plugin
- Install and Activate the Plugin
-> Navigate to the “Plugins” section in your WordPress dashboard.
-> Click on “Add New.”
-> Search for “Temporary Login Without Password.“
-> Install and activate the plugin. - Generate a Temporary Login Link
->After activation, navigate to the “Users” page.
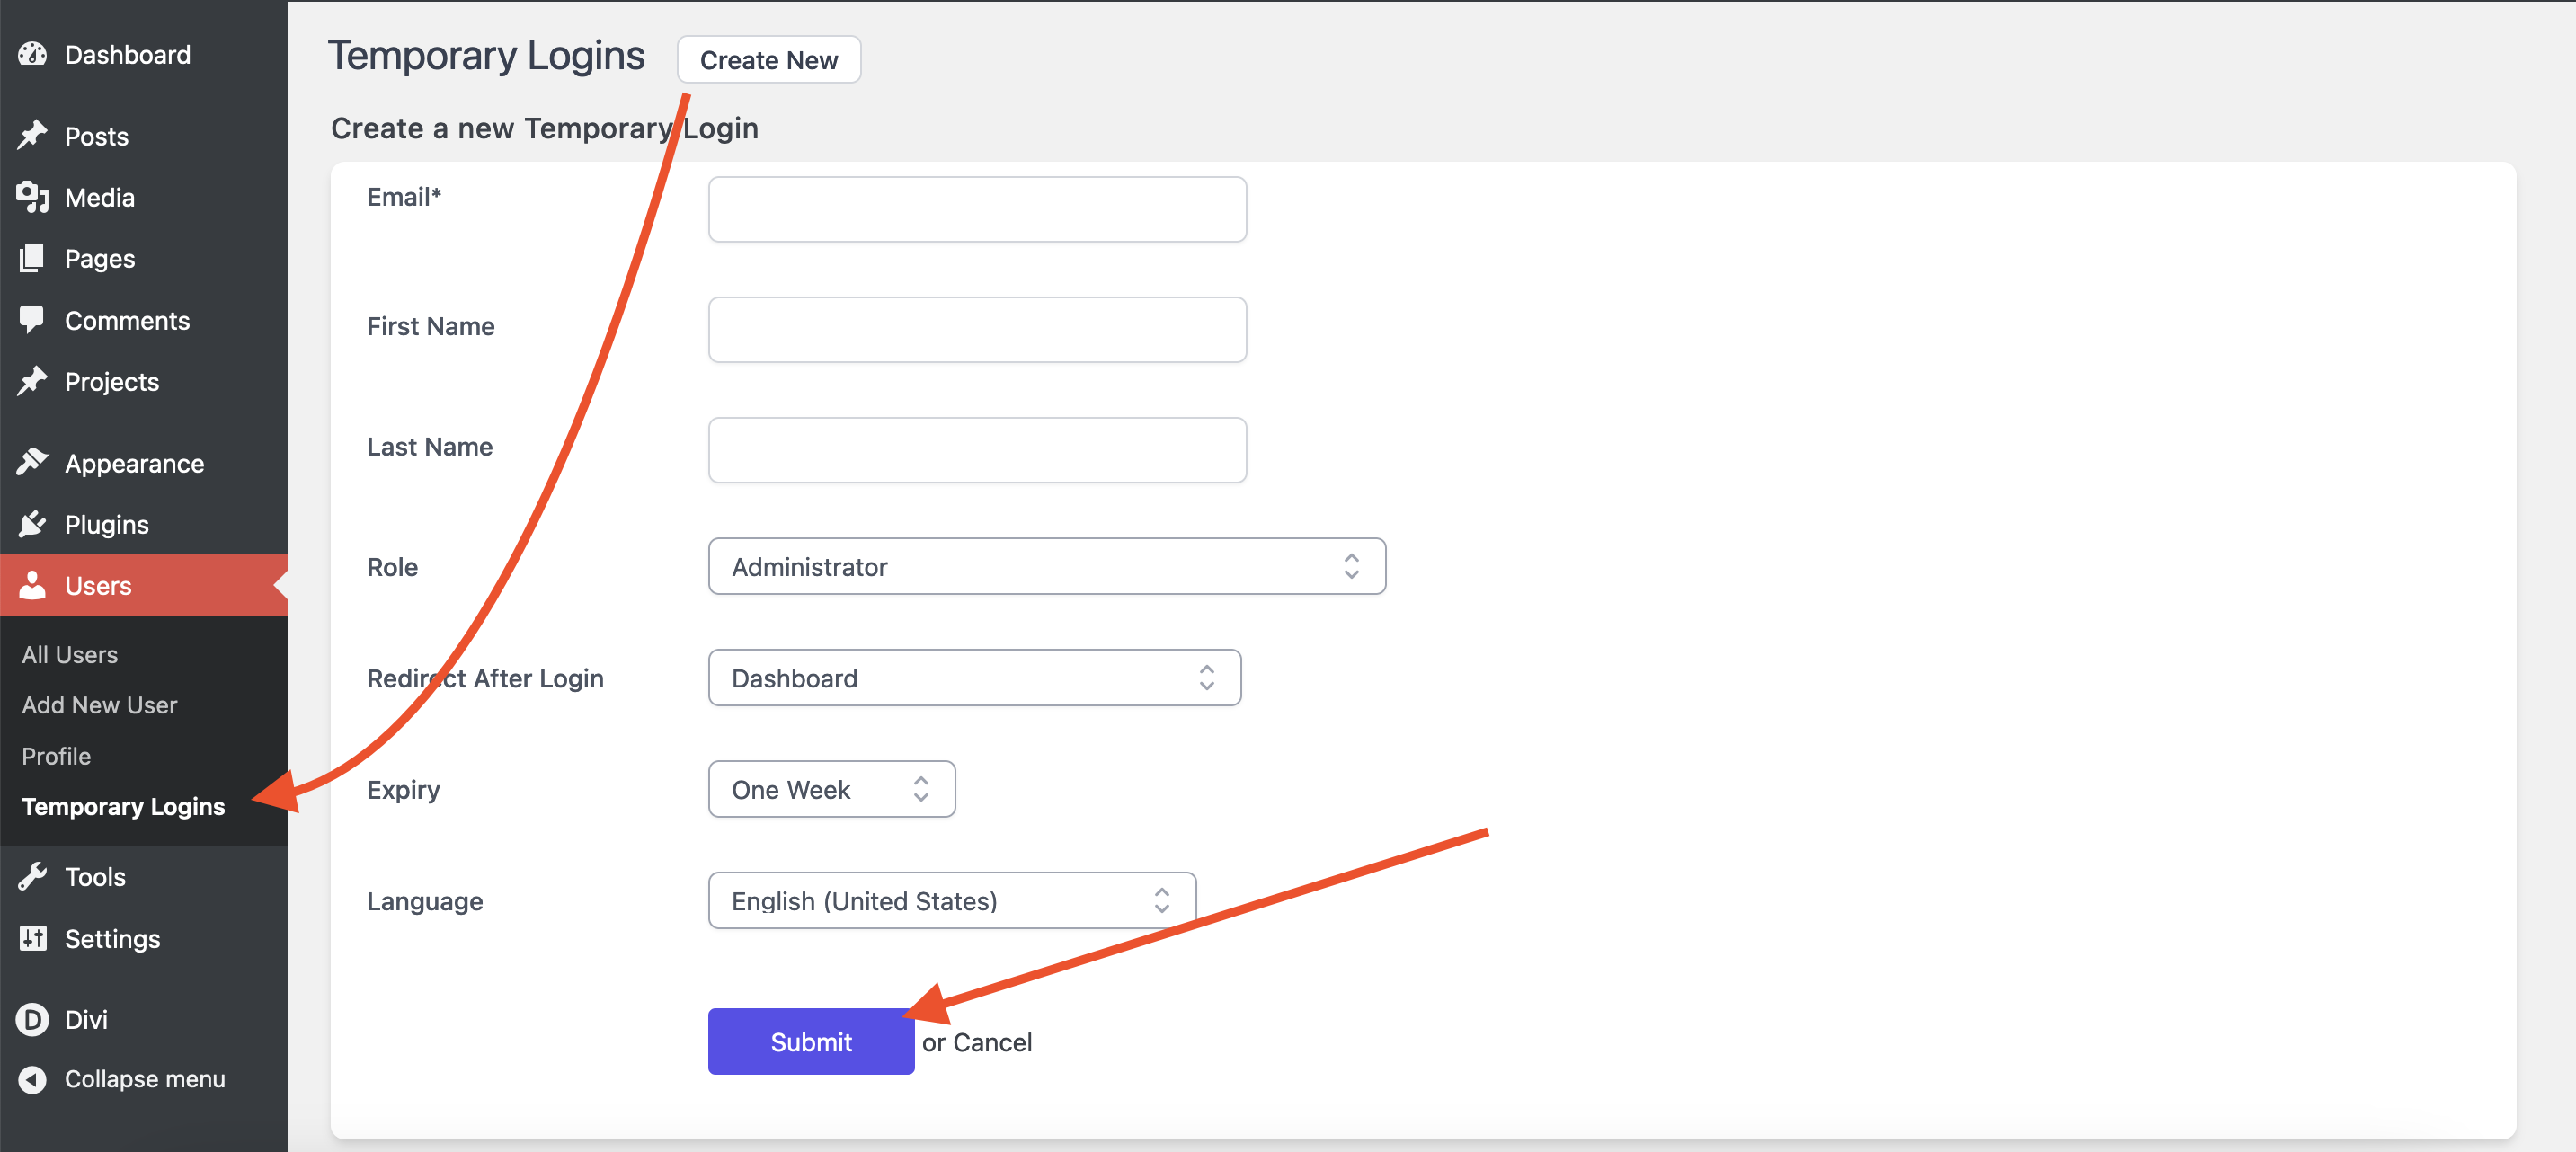
-> Click on “Temporary Logins” and then click on the “Create new” button. - Configure Temporary Login Settings
-> Enter the email address and name of the new user.
-> Set the expiration date for the temporary login link.
-> Choose the user role for the temporary login (Administrator, Editor, Author, etc.).
-> Click “Submit.” - Share the Temporary Login Link
-> Once configured, a temporary login link will be generated.
-> Share the link with the person who needs access.